Showing posts with label Bay Area. Show all posts

Sunday, October 11, 2015

In The Works: The Pantry Project

Following the completion of Blue, my next project is "The Pantry Project." This was from the master bathroom of my grandparent's house. The house was built in 1932 and this was a built-in for the bathroom (hence, one side is unfinished.) 

When my parents remodeled the master bath when they moved in, they put this in the garage to use for storage. It was tucked in the corner and I don't think ever held anything more than a box of 12 golf balls and golf ball shag bag to pick up balls when practicing putting in the back yard.


I love the look of this old girl. The base has rotted from years of sitting in a damp garage that occasionally flooded, so I will have to cut that off and add a new base. So, I'll get to try out my skills with a circular saw and my nail gun! 


I also love how the drawers open down. I'll definitely have to take out that old contact paper. I want to pain the inside something bright & light and maybe (maybe...?) put in lights along the top.  But my electrical skills are severely lacking, so I might have to add that sometime in the distant future. 
I'm also going to keep the original hardware--the hinges for the drawers are pretty cool, but need to have the paint removed. I've not seen any hinges like that ever before, so I think it would be a nice touch. 

I'll have to get the paint off, but I don't foresee that being too much of a problem (he said hopefully).


The color is still being debated. I was thinking of a bright red, then wiped down with a stain to mute it and give it some darker tones. Kind of like this:

Someone suggested distressing it, I'm not a real fan of distressing--a little goes a long way in my book. Also, I'm trying to bring it back to life--sure, it's a workhorse, but it does have a sort of simple quality where I think she deserves to look her best. 


Friday, October 9, 2015

Dresser Project (Part II): Blue

I've finished the second dresser. It's similar to the previous dresser, but instead of the sides of the drawers being red, these are blue. I'm now dubbing the previous dresser as "Red" and this one as "Blue."

I'm not that great with sanding. I think I've removed everything and after wiping everything down, it's pretty clear that some are better than others. However, I'm going from a black stain to a black stain, so I'm not too concerned. (When my sister restained a matching bookshelf a few years back, she went from black to a light brown, so she spent hours sanding.) I just needed it to have something to hold on to.
A little too much black still left. This is after the stain conditioner dried.
Meh... not too concerned.

Ready for painting!

I'm also working slightly differently on this one than the last: I used a stain conditioner to start and I'm also using foam rollers to apply the stain. What a difference!

I'm already impressed with the conditioner...

The first time it seemed to take forever to get everything stained. The roller made is zip along... and I love how the finish looks! I had three heavy (possibly too heavy) coats of stain on Red, I had three light coats on Blue and I think it looks better.

Naturally, I forgot to take pictures of the painting as it went along... you'll have to scroll down for the finished product.

For the sides, I made sure to tape the heck out of the drawers for spraying... 

And then covered all my staining with paper. 

I used a coat of Rust-Oleum Flat Gray Primer for the base.

Which coated nicely. 

For color, I used Rust-Oleum again. I know it says it has primer in it, but I wanted to make SURE it was done right.

I was tempted to try two coats in one afternoon, but didn't want to rush it. So, a second coat went on the next night to make sure it cured properly.

Here is the finished product:

The drawers curing...

With the original hardware.


I don't think I have a shot from the front. 
I think the black stain turned out well.


Here are a few shots of my staining and spray stations... I was far more careful with the spraying of paint than I was with the staining. That poor table will have to be redone if I'm ever to use it for anything else again. However, for the foreseeable future, it's a workbench in my garage!

The gold chairs in the background will possibly be used for a future painting project. My grandmother used them as extra chairs at her house. They are gold and actually really nice. I'm thinking of painting them another color and distressing them so the gold comes through. But that's a distant project.


Spray Station: definitely high-tech.


Lessons Learned:
  • Definitely use foam rollers for paint and staining. It makes the project move SO much faster and it goes on really nice. 
  • Stain conditioners make the process go much smoother. The whole staining process was much easier.
  • Keep taking those pictures!


Friday, October 2, 2015

I Bought A House!

In July. 2015 I bought my first home. I'm hoping it will be my only home, but who knows what life will bring? I work in the SF Bay Area on the peninsula, but my home is in the Oakland Hills. It's quite a commute. I hate commuting, but I think it's worth it: you can get more bang for your buck in Oakland--houses with style for a somewhat reasonable cost.  There's no way I could afford a place in San Francisco. 

Here are a few pics--these are from the posting on the MLS, so the house looks very staged, I'll post more of my own as I go along. My little house on Sheldon Street is pretty cute, don't you think? 

Old pic... due to the drought, the 

I love the gate. However, I can't get my car down there... well, I could, but I'd never get it back up the driveway!

Good sized living room...

AWESOME kitchen... 

Guest bedroom

TV Room downstairs

The view of the SF Bay.
The Oakland airport is in the distance--very sparkly at night!

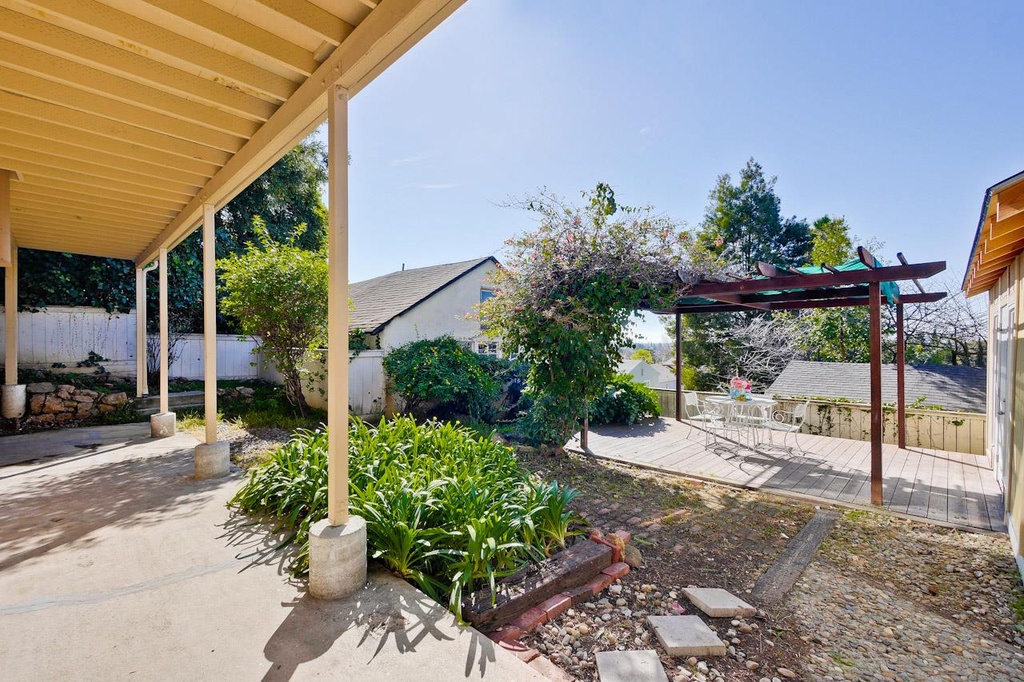
The backyard... so much work needs to be done.

Loving the little deck!


I have all sorts of projects I've been working on: shelving, refinishing furniture, decorating, closets, organizing, etc.  As I've been going through endless websites, blogs, and Pinterest, I thought that maybe I should start a blog to follow my progress. As I work on projects, I'll post... maybe someone will even read my posts!

And away we go!